Showing posts with label makeover. Show all posts

Wednesday, October 9, 2013

Bathroom Makeover, Day 11


It's Day 11 and we are almost done.... I think.  Do you remember the tiles on the floor?  Well, here's a picture to remind you.


We used the same glass tiles we used on the floor for the back splash as well.  I was very fortunate to have my dear husband, Robert, work on the back splash, while I was out garage sale shopping.

He used his drummel tool to cut the edges of the tiles that would be on the two edges.  The tiles were not attached to each other, but had a paper on them that kept them together in rows.  The process was basically the same as putting the tiles on the floor.  He used the premixed thin set and applied it to the wall with a trowel.  He started on the ends and put the tiles on.  After he was done, he removed the paper on them, so he could put the spacers on.  He used a piece of wood on the bottom, to separate the tiles from the counter.


He did a great job!  I can't wait to see how it looks, once it is grouted!


So, I didn't completely escape from chores today.  When I got home, I did all the caulking.  We have a caulking gun, but I prefer to use the ones in the tube.  It's really not hard to do.  I simply ran the caulk down the area I was working on.  Then, I wet my finger in the water and went across the area to even it out.   I keep a rag nearby, in case I need to make any clean ups.


Last thing to do today was to fix the linen closet.  Since we removed the medicine cabinet, we needed a place to put the items that had been in it.  I didn't want to put them in the closet, where they would just get buried. So, we hung up a shower caddy and 2 little boxes to put things in.  We just screwed them into the door.  I spent $4.00 at thrift stores on these items.


Well, I'm pretty pleased with Day 11.  We have come a long way and it is starting to feel like a new bathroom.  I'm excited to have come this far and can't wait to have it all completed!


Tuesday, October 8, 2013

Bathroom Makeover, Day 10


While we were at work, Cassie (my daughter), painted the cabinet a denim blue.  I love the color.


Robert removed the sink.  We had to remove the wallpaper that was behind it.


OK, so this is where our big splurge came in.  We decided to buy a granite counter top.  We went to a place that had precut slabs, so we saved some money on that.  We also bought the sink from them and had them drill the holes for the sink.  We bought the faucet off of EBay for only $40.  To give the granite top more support, Robert put a board on top of the cabinet and fastened it with countersunk screws.  He cut out the hole for the sink and then applied an adhesive.


 Here's Cassie helping Robert bring the new counter top in.  Isn't she a doll!


Yay!  Counter top is in!

Next, since we had taken Gravy's sleeping place away from him for a couple of weeks, we had to get his approval.  As you can see, he wasn't too sure of it at first.


But... he began to warm up to it.


And before you know it, he was happy in his new bathroom.


Now that we have Gravy's approval, we can continue on with the backsplash!


Friday, October 4, 2013

Bathroom Makeover, Day 5


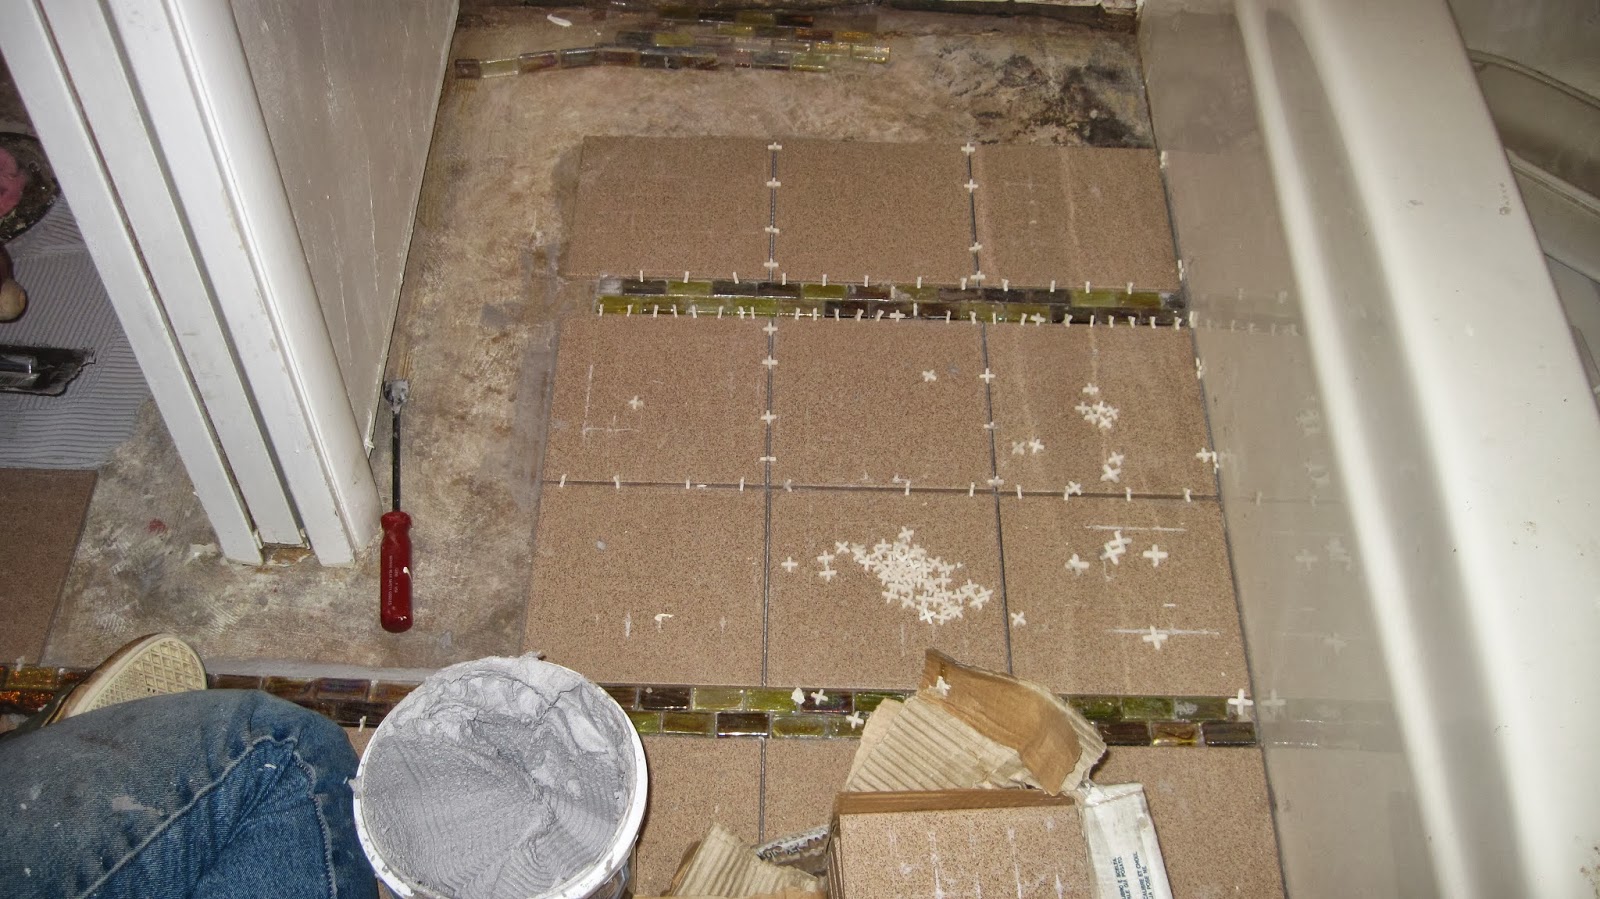
Now that everything was cleaned up, it was time to lay the tile.  We bought the square tiles at Habitat for Humanity for $20.00.  Cory's dad had glass tiles he gave us.  We had to come up with the design first, so we laid tiles on the floor to see how it would look.  Because of the design we came up with, we needed to start in the path of the door between the two rooms. We drew a straight line from one side to the other.  You can see the line in the first picture. This will keep the tiles even.


First thing. was to make sure tiles were even, after laying them. As you can see, my husband, Robert, was happy to lay his first tiles!


We used a premixed thin set (mortar), which is so much easier. We applied the thin set to the floor (it's like mud), and then we spread it out with a trowel.  Once you have an even coating, you just go over it with the trowel, to make the lines.  We applied a small amount of thin set to the back of the tiles too.  This is called back buttering.  In some areas, where the floor isn't even, you may have to back butter them more or less.  Just keep using your level to check on them.
Once you lay the tile down, slightly move it a little to embed the tile into the thin set.  After second tile is laid, apply spacers. You need to put one on each end.  The size of spacers will just depend on how close you want your tiles.  It really just a matter of preference


Because we stopped before all the tile was laid, we made sure to clean up all the excess thin set around the tiles.


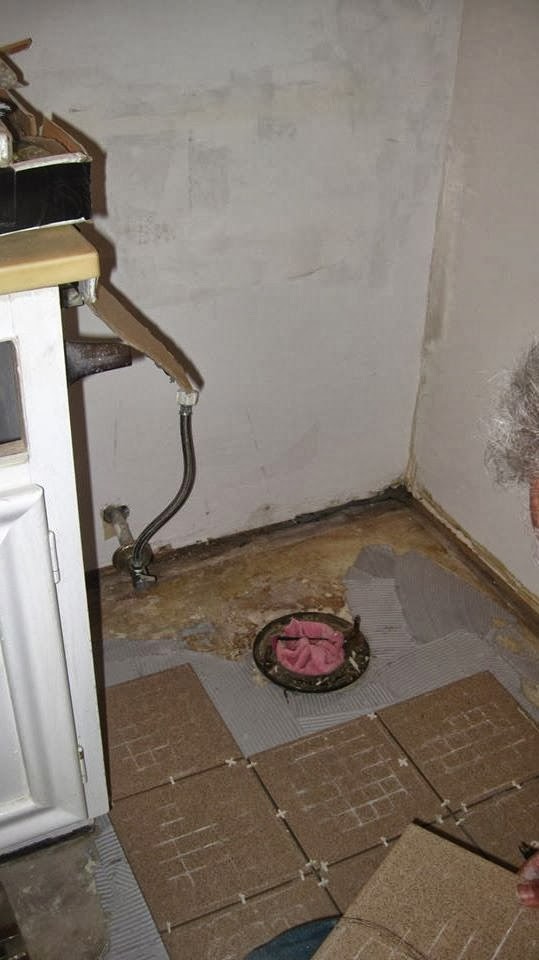
It's Friday night and we wanted to have the toilet back before Monday, so Robert removed the old toilet.  I was so glad to see that toilet go.  It didn't flush very well.  We tiled around this area, so it would have time to dry well.


We had to remove the wallpaper and fix the walls here too.


Well, this is it for now.  Tomorrow is Saturday and we will finish the tile then.


Bathroom Makeover - Day 1

Here goes the beginning of our next project.  The first thing to do was to get rid of the baseboard.  Robert used a crowbar and hammer to loosen them up.  We want to make the bathroom doors bigger on the vanity, so he removed the top part.


Next, we had to remove the wallpaper.  I sprayed it with water, let it sit for a minute and then ripped it out.  Wherever the glue didn't come up, I just sprayed it again, and then removed the glue.  This was a job in itself.
Notice that the medicine cabinet is gone!!!


Normally, we would have removed the toilet too, but with 4 people using it in the morning, we are keeping this job for another weekend.

 We started fixing the walls.  They were messed up in areas, after taking down the wallpaper.  We used spackling wherever it was needed.  Spackling the walls is not difficult to do.  You just put it on and wipe it down till it is smooth.  Once it is dry, you sand it down.  In some areas, you might have to go over it several times, before it is all even.


Other side of bathroom.
 Removing the wallpaper wasn't really hard, but just time consuming.  I was so glad to see it go, that I think it made the job easier.


Thursday, October 3, 2013

Bathroom Makeover

This has got to be the most extreme makeover we will have done.  My daughter and her fiance' are living in his grandparents house.  It's about 40 years old and needs a lot of upgrading.  The bathroom was the worst.  Here is what we started with:


There is two different wallpapers.  One was put over the other.

Side of bathroom with bathtub and the lovely wallpaper.

Ceiling needs to be fixed.

There are two layers of linoleum on floor.  First layer is torn up.


More of the beautiful wallpaper.  Ha!

Linen closet is behind the door coming into the bathroom.  Paint is chipping off.

Doors are very short and make it difficult to get into the cabinet.

You guessed it, more wallpaper!


Look at the medicine cabinet.  The light fixture has the only plug in the bathroom.

First, we had to decide what we wanted to do to the bathroom (which was basically start from scratch).  My daughter fell in love with this bathroom:

It's by IHeart Organizing.  Now, after seeing our bathroom, this one is outstanding!  Well, it was anyways, but I have to say, ours really helps!

Well, tomorrow I'll be posting our first day.  Wish us luck on this one!!!