Showing posts with label diy. Show all posts

Friday, June 27, 2014

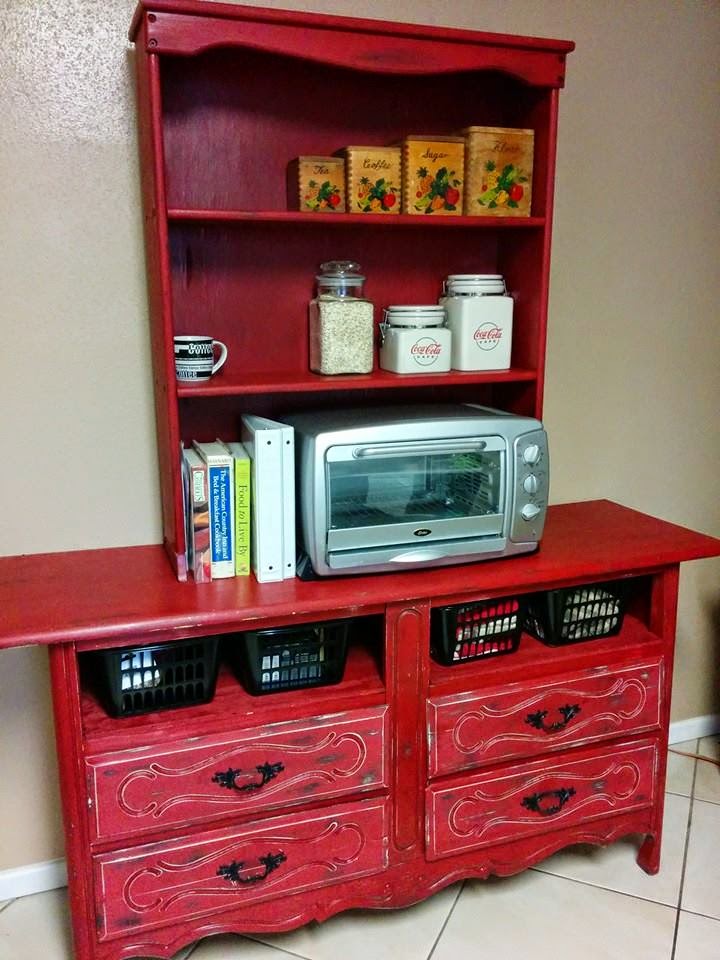
Remake for a Kitchen Hutch


We have been living in a rental home for the last several months.  The kitchen is short on cabinet space.  Here is our solution.
 
I found this beaten up dresser when the city was doing bulk pick up in our area.  The top was missing and so was one of
the drawers.  A couple of the drawers were messed up.  It was in really bad shape.


I also found this piece on a curb. 


We had a table we had picked up and used the top of it for the dresser.  My hubby 
cut it in half.  He also made shelves for inside for the top two dresser drawers.


Here, we had to glue the slider for the drawer back in place.


Our main color in the kitchen is red.  I wanted to paint it red and make it look old. First, I had to
lightly sand down all the pieces.  Next, I spray painted all the pieces with black  spray paint. Once
it was dry, I spray painted them with red.  I used Rustoleum Ultra  Cover 2X, Colonial  Red, Satin.


To paint the drawers, I used double sided tape and covered the inside of the drawers with
newspaper. I sprayed them with black spray paint first, and then the red.


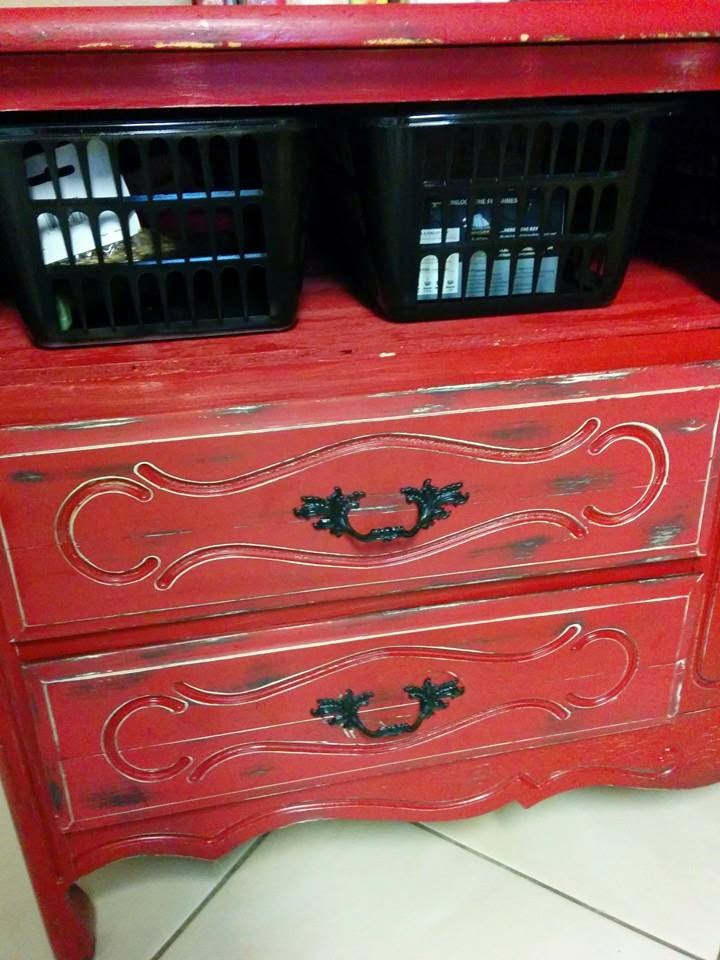
Once all the pieces were dry, I started sanding it.  I sanded some areas so that the black was showing.  I used a
smooth sandpaper when doing this; otherwise, it looks scratched up.  It takes a little longer, but is worth it.


I cleaned the handles with soap and water to remove dust and dirt.   After they were completely
dry (this is important or you will end up with bubbles), I placed them on newspaper and primed them.  
Once the primer was dry, I spray painted them black.


I searched everywhere for the right size baskets and finally found them at HEB for $1.39 each.  I spray
painted them black and they are perfect.   I also love how the drawers came out. 


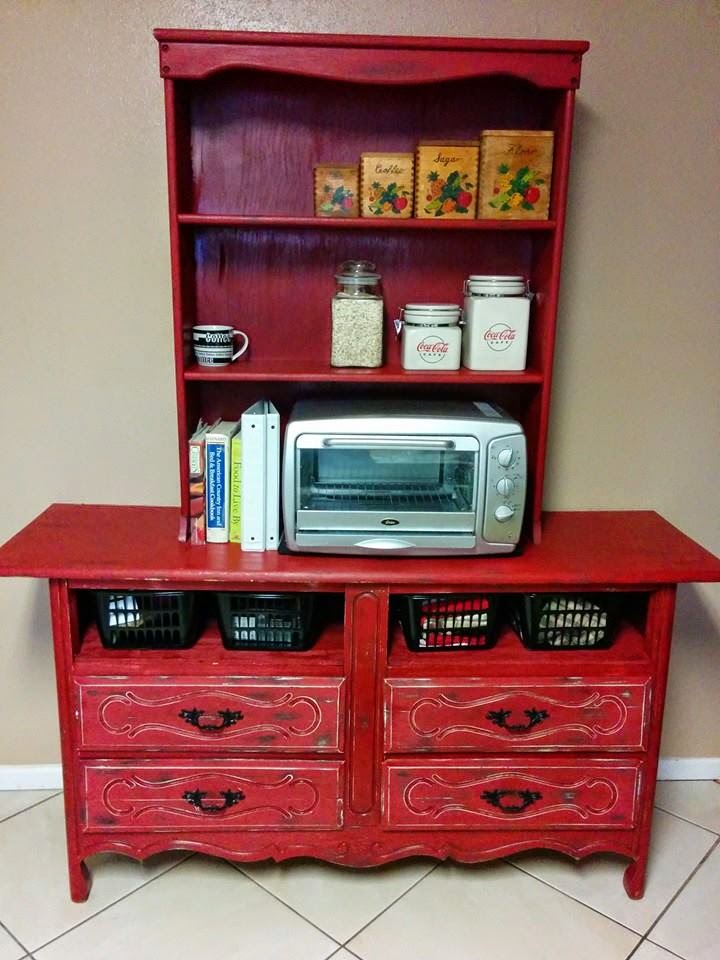
And here's how it looks.  I'm really pleased with it.


Sunday, January 5, 2014

Upgraded File Cabinet

We moved in to our home a couple of weeks ago and had very little furniture.  I'm working on my office right, which had no furniture, except for two orange seating chairs, a desk chair, and 2 lamps.  I found a large file cabinet at Goodwill for $15.00.  It's very large and very sturdy, which is great for storing my vintage dishes in.  Only problem is, it's ugly.


Here is is at my home.


I am trying to fix our house up, with spending as little as possible.  I went thru everything I have and came up with an idea to decorate it.  I have a lot of white wrapping paper from the dishes I buy.  I decided to try and use them.  I made a flour and paste mixture first.  I crumbled the paper up and then tore the paper so there was no straight lines.


 Next, I brushed the flour and water mixture onto the paper with a paint brush. 


 I started at the top of each drawer.  To get the crinkled look, I put it on loose.  You can see this better in the next picture after this one.  I patted it down with the palm of my hand.  Don't worry if you tear it, you can either push the paper up to cover the hole or add another piece.


This is how it looked after it started drying.  While it was drying, I took the handles and scrubbed them down before I put a metal primer on them.


I decided I wanted it to have some color, so I started looking into what I had.  I found some tissue gift wrap that I thought would look good.  I cut 4 squares, a little larger than the size of the doors.


 I applied the flour and water mixture to the back of each panel and then placed it over each drawer.  I folded the ends in all the way around.  Once they were all dry, I sprayed them with several coats of lacquer.  I think this will give it more durability.  While the drawers were out, I scrubbed this humongous thing down.  It really needed it.


And here it is, after the knobs were painted as well.


 I am very pleased with it.  I think it looks so much better than it did before.  Please feel free to ask questions in the comment box.  I look forward to hearing from you.


Wednesday, January 1, 2014

Our Bedroom in Our Last Home


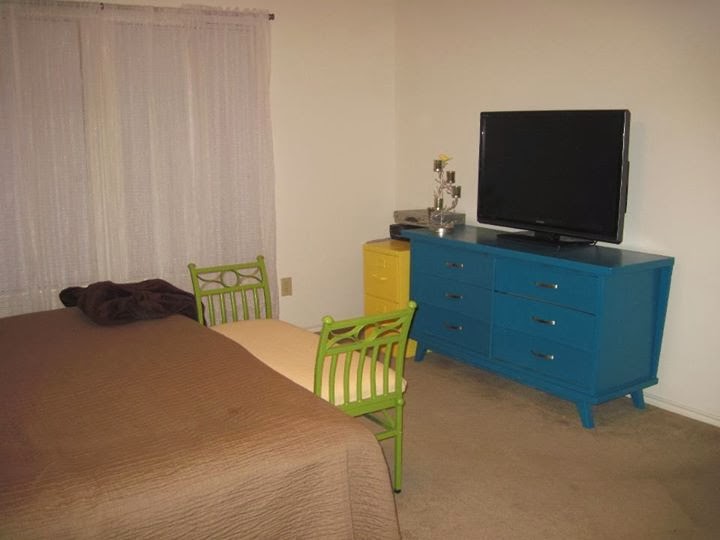
 These are pics from our last home.  I had already painted the dressers before we moved here. 


 I found this sewing machine desk and mirror at Goodwill.  I paid $35.00 for both.  I sanded them and spray painted them yellow.  I also found the lamp at Goodwill for $10.00.  The chair was free.  I spray painted it green, but never got around to reupholstering it.  I made the necklace holder and will do a tutorial on that soon.


I hadn't gotten around to painting the nightstands before we moved.  I love the blue..  I used Valspar Primer, since they aren't real wood.


I lightly sanded them first, wiped them down, and then primed them.


I removed the handles and then spray painted them.  We had to wait several days before putting anything on top of them.  I made the mistake of that once and it will leave an indention on top of furniture.


 I found a metal bench at a garage sale for $10.00.  I spray painted it the same color as one of the dressers and the nightstand.  We already had the foam and fabric.  If we hadn't, I would have waited till it was on sale for 50 percent off, or used a coupon.  I would never buy this at full price, unless I was really desperate.  I used an adhesive spray and placed the large thicker piece of  foam on the wood first.  We had two pieces of foam that were thinner.  I used them on top of the thicker one and had enough of it to wrap around to the bottom.  Then, we placed the fabric under it.  We allowed at least 6 inches extra of  fabric around the frame.


 Using an electric stapler is the way to go!  We folded the fabric over the board tightly and stapled it down.


 And here it is.  It's also very comfortable.


I think it looks great in the room. 


 Did you notice the file cabinet?  I spray painted it yellow to match the room too.  First, I used a spray paint primer and then painted it.  This was very simple to do.


 I just love all the colors together.  Our room feels so homey.


Tuesday, December 31, 2013

Last Post for the Year

Well, I am so thankful that I even started my blog this year.  I had been thinking about it for a couple of years and was so afraid to even try.  I worried about which site to use, how I wanted it to look, and how difficult would it be.  I finally decided to just go for it and I am so glad I did!  (Now that I've figured out how to do things on here - Thank you "You Tube" and to all those "how to" videos).

I had so much fun sharing our projects with you!  I just need to remember to always have my camera available and take pictures of everything!  That actually seemed to be the most difficult thing.   We would get so involved in our projects that we would forget.  I had to tell my husband to stop several times to get pictures and sometimes, I didn't get them!  So, this year we will be more conscious of that!  Hubby is even getting better at it.

What better way to end the year, than to share my top 5 post with you!  Hope you enjoy them one more time!

My number 5 post was our Bathroom Reveal.  This has to be one of the most extreme makeovers we have done.  You have to look at the before pictures to really appreciate it! This is my daughter's home.  It took us a couple of months to get this done.  For awhile, it seemed like we would never get done, but we did and I think it turned out awesome, so please go check it out!


Number 4 post was How to Get Rid of Mildew Smells.  If you have had problems getting rid of mildew smells on your towels or other laundry, you really need to check this one out.  My wonderful niece, Leslie, gave me this idea.  She had tried everything and nothing worked until this, so go take a look.  You will be surprised how easy it is.


Number 3 post was Bathroom Linen Closet.  Do you have a small bathroom or just nowhere to put all that little stuff that gets lost among the bigger things?  If so, you really need to go check this one out.  This gave us so much more space and the little stuff was much more visible.


Number 2 post was Organizing Stuffed Animals.  Have you tried everything under the sun on where to put all those stuffed animals?  As tempting as it is to just throw them away, you know you would be in trouble for it, so here is the next best thing.  I think it looks awesome and the kids will love it too!


Number 1 post for the year was a gift my daughter made my husband.  Father's Day is coming up soon and I know any dad would love to have this.  So, go take a look at Dad's Gift.  It's also very easy to make.


So, these are my top 5.  I think a couple of my last ones may have given these a run too, if they had had more time.  So, you might want to check out some of them, as well.  Especially, Making a Headboard and Making a Centerpiece.  I have to also add Setting Up House.  We moved a couple of weeks ago.  We had no furniture and no budget.  Check out how we furnished out home.  I will have more to come on this one.

I hope you and your family have a wonderful New Year! I know I'm looking forward to this year being a new beginning for us.  I hope to be able to have so many more post this coming year..  I love creating things and am looking so forward to sharing them with you.

You can also fill in the "Follow By Email" and then you will automatically know when I have a new post.

God bless and Happy New Year!!!
Becky


Wednesday, November 27, 2013

Dining Room Makeover

Here's another room in Cassie's house.  The dining room. It had wallpaper in it and Cassie had removed it.  The walls needed major repair and the room was very dark with all the paneling and wood.


We first applied Spackling Paste to all the areas that needed it.  We used a trowel to smooth it out and let it dry.  Once it was dry, we lightly sanded it down. 


Once the walls were dry, we had to prime them.  We applied spackling again to areas that still didn't look right and repeated the same process again.


The blinds had to go!!


Don't the white ones look better?


Once the walls were all done, we painted them a light pinkish mauve.


The paneling and dark doors were what made this room look so dark and closed in, so we wanted to brighten it up by painting them.  We had to sand them all down first.  We used a shop vac to help with keeping the dust down.  It helped quit a bit, since there was so much to sand.


Here is what it looked like after we primed all the wood.


The door and cabinet doors were a dark brown also, so we had to sand them down and prime them too.


We painted the panelling and doors in a white satin.


Here's the final room.


It looks so much bigger and brighter.

This is our next project.  Can't wait to open this space up more and brighten the family room up too.