Friday, March 28, 2014

Sewing Caddy


I made a holder to put on my sewing desk a couple of years ago.  I love having it there.  It's very handy for keeping things I use a lot or simply for when I don't feel like putting something back right away.  
It has since been in several moves and needed repair.  So, thought while I was fixing it, I would share it with you.

 I bought two tin pans at the Dollar Tree and a tin can from a thrift store.  I also bought two candle holders from a thrift store..  I painted the tins black and the candlesticks red.  I used ribbon for decoration.  This project cost me a little over $5.00.


 I used a glue gun and glued all the pieces together. Here is where I glued the candlestick to the bottom pan.


Here's gluing the next pan onto the candlestick.


 I added a decorative ribbon onto the bottom of the candlestick.


I added more ribbon around second pan and on the top.  


Here's another one I have on my desk.  I bought a pen console from Office Max.  It has been great for scissors, seam rippers, safety pins, oil, and more.  It turns around, so it's easy to get everything I need.


Thursday, March 27, 2014

Sewing Room Makeover

I was going thru my pictures and ran across my sewing room in a previous house.  This was before I started Bringing It About.  I'm almost embarrassed to show you how bad my room looked.  It was becoming a junkyard and I knew it was time to do something about it.

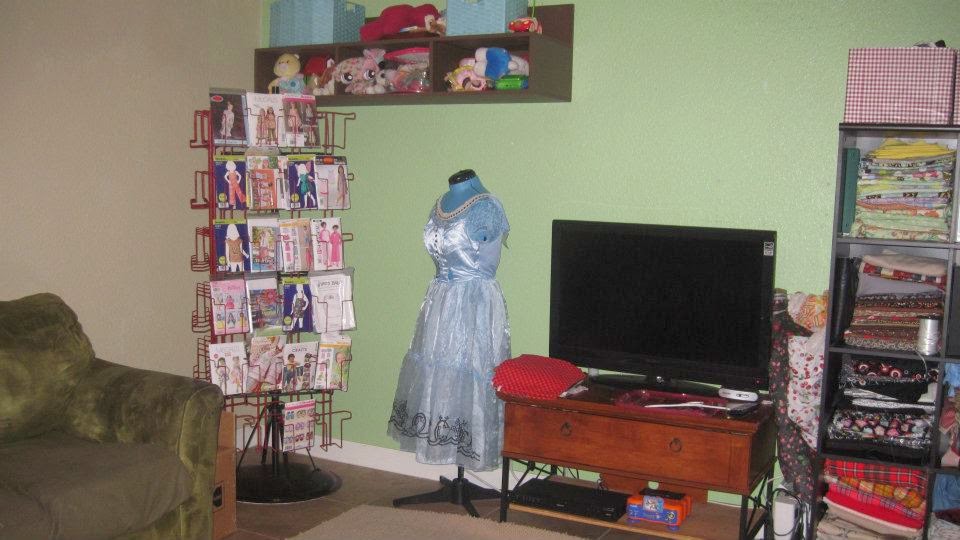
 So, here are my before and after pictures.  We get to start out with the before.  My fabric was everywhere.  Nothing was pretty about this room.


Not getting much use out of this ironing board.  Don't you just love my peg board?  NO, me either!


I do like the spools of thread hung on the wall.  That's about all I love.  Oh, and the young girl behind the door.  hehe


 Here's my after pictures.  I did several things in this picture.  I painted the white shelf black with a spray paint.  The boxes on the top have all my scraps.  I used contact paper from the Dollar Tree and covered them.  I made the pictures and hung them up.  One thing I really loved about this sewing room was the ironing board.  My dear husband took it apart for me and screwed it on top of the dresser.  (Sorry this are such horrible pictures).
I took all the fabric out of the shelves and then color coordinated them when I put them back.


Here's a better look at the pictures.  I bought all the frames from thrift stores.  I didn't pay over $2.00 for each one.  I painted the red frames with spray paint.  I used fabric I already had and placed them inside each frame.  I used ribbon on the bottom middle one and the bottom left one had little bows on it.


Here's a better look at the ironing board. I might have to do this again.  Since we moved, I didn't have a place for it and we sold the dresser.


 I covered the bulletin board with fabric I already had.


 That's Sophie with the dress on.  Unfortunately, when we moved, I had to sell her.  I still miss her!


Here's the "after" pics.  You can also see the finished bulletin board.  I added ribbon to it.  Check out all the other little details I did.


I bought this at a thrift store for $1.00.  It has worked great for my bias tapes.


 This is two spool holders.  I painted them black.


 Close up of my inspiration board.


 These cans were $1.00 each.  I have elastic in one and ribbons in the other.


My husband built the shelves and added them to the right side of the dresser that has the 
ironing board on it.  I bought the little cans at thrift stores.


 I painted the pattern holder red.


I bought a spice rack at the thrift store and spray painted it red.  I added felt to the tops 
of the lids with a little decoration.  I put a button in the center on each one, showing what 
color of buttons are in each container.


 I added the ruffle on the front of this desk, since it was all open.


 I made this with to baking pans and a round can on top.  I used candlesticks for the center 
pieces.  This has been great for holding my pin cushions, tape measures, etc.  It's a great place to 
put things when too busy to put them away.


So, I went from this....


To this.....


Much better I would say. I amcurrently in the process of fixing up my sewing room.  So, hopefully I will be done soon and can share my new sewing room with you.  Hope you got some ideas for your space.


Wednesday, March 26, 2014

My First Wall Hanging Picture


Friday, after work, I decided to go shopping and look for a picture to put on my mantle.  I was out shopping for over 3 hours, went to at least 7 stores, and found nothing!  They were either the wrong color or the wrong size.  It was very discouraging.  Finally, I ended up at Hobby Lobby and decided I would make my own picture.  I found the  blank canvases on sale for 2/$7.00.  The paper was 50% off, so I spent $5.00 on paper and then bought the word decals.  I used a 40% off coupon and bought Mod Podge.  I would say my picture ended up costing around $14.00.


I started out my ripping the paper.  I used the Mod Podge to glue the paper onto the canvas and then went over the top of the paper with the Mod Podge.


Once it was done, I went over it a few more times with the Mod Podge.


After it was dry, I added the decals to it.  Then, I added another coat of the Mod Podge.


When we put it on the mantle, we decided it was too small.  I had an old frame I had bought at a thrift store.  The canvas just fit perfectly inside it.


 I lightly sanded the frame and the spray painted it black.


When the frame was dry, I placed the picture on top of the back of the frame and used a glue gun to glue it in place, mainly around the four corners.

We hung it on the wall with Scotch Adhesive Tape and here it is.


Sunday, March 23, 2014

My Remake of a Clock


After my daughter's wedding, I am ready to get my house in order.  We moved in in the middle of December, had Christmas, bulk pickup, and then full force into the wedding.  This weekend, I worked on the living room.

I went to a garage sale after work and found this clock  It looked new and was $10.00


At first, I was just going to hang it on the wall, but it didn't really match everything else.


So, here is what I cam up with and how I did it.

1)  I decided to paint it black.  First, I put paper over the center of the face of the clock and then used painters tape all the way around. You need to press around all the edges to make sure paint won't seep thru.  Once it was painted black, I let it dry for half a day or more.


2.  I painted the pendulum red. (Sorry, no picture)


3.  I took a piece of cardboard, traced the size of the bottom part of the clock and then cut it out. 


4.  I used the cardboard to cut out the paper next.  I bought this at Hobby Lobby for $1.00.  I cut the paper about an inch larger than the cardboard.  


5.  I cut out little dart all around the paper, especially along the area that curves.


 6.  I used a spray adhesive.  (Do this part outside).  I folded the top part over first and then started on the top sides.  I made it was on smooth and the paper was folded over tight.   I added a few more darts towards the bottom, to make it easier to smooth out the paper.


 7.   I used a glue gun to add glue along the edge.


8.  I placed the paper under the clock and pressed down till the glue is dry.


9.  When the pendulum was dry, I put it on the clock.


This clock cost me $12.00 and I am very happy with it.


You can find me partying at:  Keeping It Simple, Masterpiece Monday, and Sew Can Do